
Nothing gets my creative juices flowing like the mini box! The challenge of making the most of the fabric always pushes me to think outside the box, and this month was no exception.
Chiffon isn’t a fabric I’ve used often—just once, at the very start of my sewing journey six years ago. When I saw this month’s fabric, I was thrilled to work with it again, this time with more experience under my belt. The fabric’s floral print is gorgeous, although, I’ve been leaning towards plains these days, I find that floral is still the kind of pattern I love.
I immediately thought of making a camisole. I debated a sheer option, considering that the colours of the fabric might work with my skin tone. However, since I prefer modest dressing, I wasn’t sure I’d feel comfortable wearing it without layering. I thought about pairing it with a cami vest underneath but wondered if layering two camisoles might defeat the purpose. I also considered lining the fabric for more coverage.

I looked into the Vikisews Linda camisole pattern. It seemed like a great choice, and I’ve been on the hunt for a go-to camisole pattern I could customise by altering the neckline or adding details. However, I wasn’t convinced this was the right project to make it a reality, so I went back to the drawing board.
Then it hit me: the Scrunchie Tote Bag by Cool Stitches! This pattern has been on my to make list for a while. It is a free/ pay what you want pattern. Chiffon isn’t typically suitable for bags because it’s so lightweight, I was certain this was the project I wanted to try and I had a plan to make it work.

To give the bag structure, I decided to underline the chiffon with a navy crepe fabric from my stash. Underlining involves layering two fabrics and treating them as one. The traditional method is to cut both pieces, then baste them together within the seam allowance. My personal shortcut, is to use fabric glue spray to adhere the fabrics, then cut the pattern pieces from the double layer.
Cutting chiffon can be tricky since it shifts easily, but a top tip for stabilising lightweight fabrics is to use spray starch. In this case, I didn’t need to because the crepe did the heavy lifting. I also reinforced the bag with regular interfacing in addition to the fleece interfacing recommended by the pattern, as I wanted to give the chiffon all the help it could get.

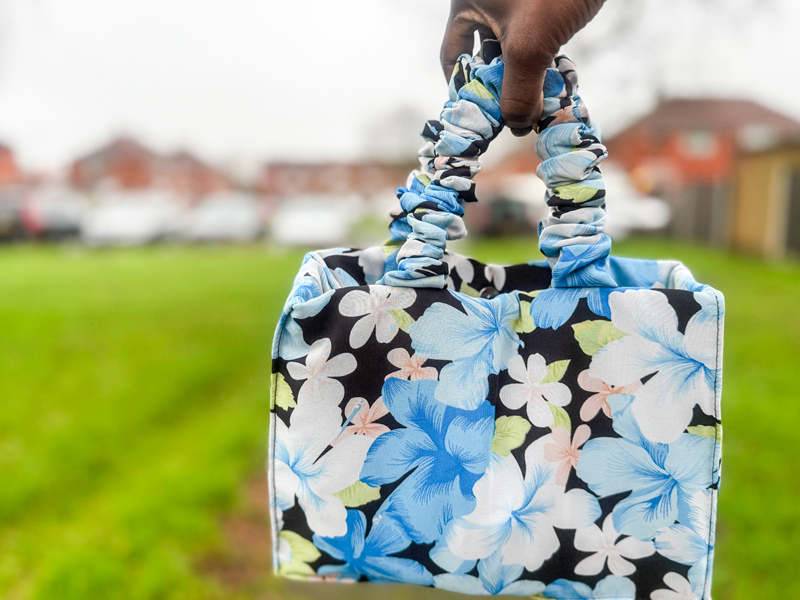
The pattern is fantastic. Unlike many bag patterns that simply list dimensions for rectangular pieces, this one includes actual pattern pieces. I love that—after a day working with numbers, the last thing I want to do is more math! I made one adjustment by shortening the strap by 5.5 cm.
The scrunchie strap is a brilliant detail. I’d always assumed this effect was created with elastic, but it’s actually achieved by feeding a shorter strap into the main strap piece. Absolute genius! For the lining, I used fat quarters from a previous box. I was thrilled that the bag includes an interior pocket, perfect for keeping essentials like lipstick and powder within easy reach.

The finished bag is perfect for me. It’s cute but practical, and just the right size to fit everything I like to carry around. I’m so pleased with how it turned out and proud that I found a way to make chiffon work for a bag.


