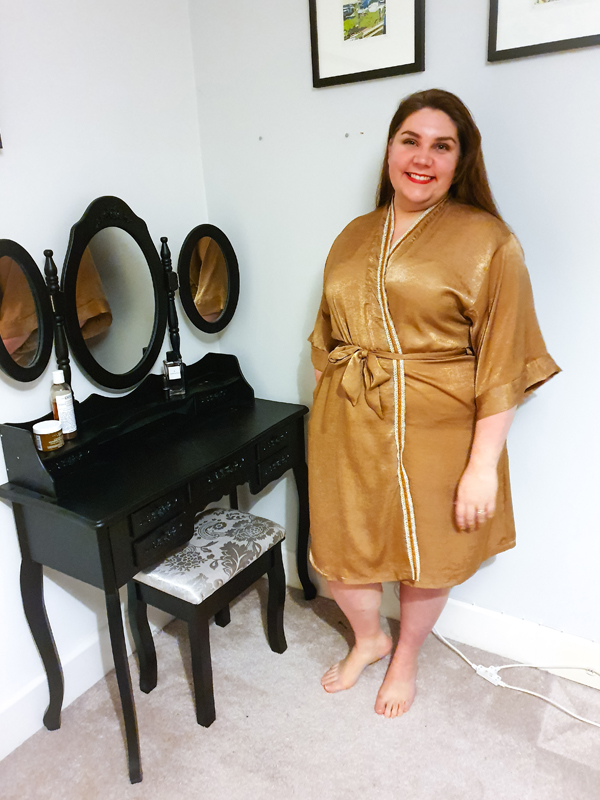
Laura’s Suki Robe

Happy New Year everybody! And what a fabulous treat this lustrous gold fabric is this month. I love the direction that Hayley went in curating these festive boxes. The slightly brushed sheen and incredible softness is super luxe. Such spoils!
The obvious choice was to make an amazing glitzy party dress; but I don’t go out all that often that would require me to wear such dresses and I really wanted to make something that I could wear all the time. So, I went slightly off-piste and decided to channel my inner starlet to make a fabulous robe. How utterly frivolous to lounge around the house in such luxury… Elizabeth Taylor eat your heart out!
There are many fabulous patterns for robes out there: I went for the Helen’s Closet Suki Robe. A pattern with great reviews and that would work with drapey fabric. I went for the shorter version B. I am quite short, so it still came out quite long on me!

Unfortunately, I did mess up cutting out the sleeves and had to recut them. This meant that I didn’t have quite enough for the four pocket bags. Luckily, I had just enough to cut them out from some leftover leopard print satin from the May “Really Wild” box. To tie it in (no pun intended!), I also used it for the inner ties too and I rather love the contrast. Save your scraps, people!
Of course, I wanted the inside to be just as beautiful as the outside, so I did French seams throughout – even the pockets! Now, this was no mean feat I can tell you… but I followed an online tutorial, and with a good helping of hissy fits and choice words, it worked out and I love it. It is not something I am going to be doing on every make, only on the special ones!
A really lovely touch in the pattern is that it provides two finishing options for the sleeve cuffs and neckband aimed at beginner/intermediate sewists, the difference being if the seams were exposed or encased. Because I was Frenching the other seams in the garment, I went to the extra effort of going for the intermediate method.
Ok, the neckband… oh my goodness, what a carry on! For those that haven’t made this pattern before, you basically manipulate a strip of fabric around a corner to make it sit like a square within the neckband space. It is so unbelievably tricky, and the slipperiness of the fabric just made it extra fiddly times a million! In credit though, the instructions were top-notch.

I do think that it is a really nice design feature, but in hindsight for this garment, I should have just extended the neckband to run the full length of the robe; especially as the trim I added covers most of it! There are instructions in the pattern for hacking this.
Does everyone else hate under-stitching as much as I do? I don’t think that I have ever had a clean sweep. I just about managed it for neckband (having basted it from the wrong side first), but I must have cut the cuffs slightly off grain as they didn’t sit great when I tried to baste it – the fabric bunched in places and pulled in others.
I will admit that even though I am quite a slow sewer, I am quite lazy! I will sew everything on the machine if I can. Hemming web to the rescue! Now the sleeve sits nicely with no wobbly stitch lines.
Simply for lavish flair, I lined the front and sleeve edges with this gorgeous vintage lace and velvet trim that I found on Etsy. I think that the “old gold” is a really good match and just exudes opulence.
Now if you will excuse me, I have a date with Richard Burton!