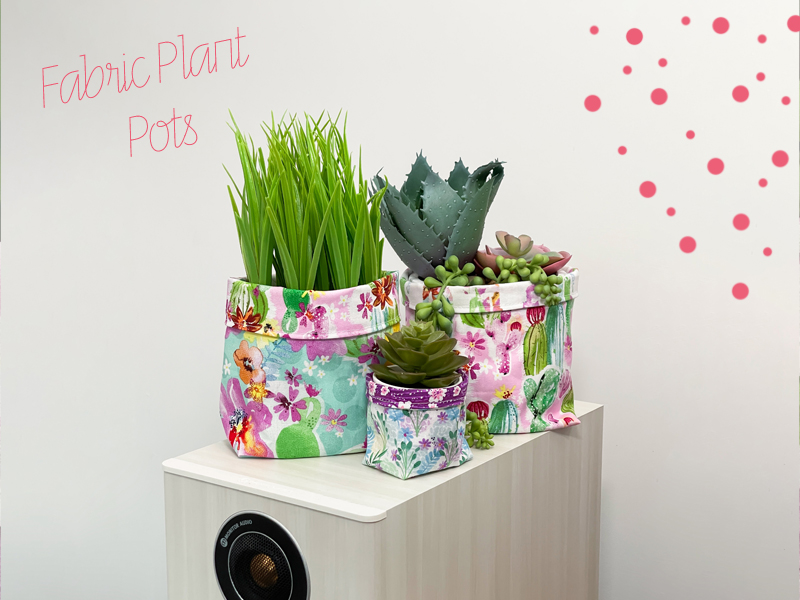
Fat Quarter Project; Fabric Plant Pots

This month we have welcomed Tamlyn who you might know from Instagram or YouTube as Sewn On The Tyne (@sewn_on_the_tyne) to the team. Every month Tamlyn will be putting together a tutorial for you for those gorgeous fat quarters. Ready to stop using them for face coverings? Read on to find out how to make these stunning fabric plant pots.
We used the Sun Valley fat quarters by Craft Cotton Co from April’s Bloom and Grow box.
You will need:
- A potted plant (Mine are artificial)
- Fabric fat quarters – iron these to get any creases/folds out
- Sewing machine with a universal needle
- Rotary cutter & cutting mat / Fabric scissors
- Measuring tape
- Ruler
- Fabric marker / chalk
- Pins / Clips
Remember to back stitch at the start and end each time you sew – this is essential to secure your stitches.
I’ll be using a ½” seam allowance throughout.
- Using your measuring tape, measure the circumference of the widest part of your plant pot. Jot this down. Do the same for the diameter (width) at the widest point and the height.
My pot measurements are:
Circumference: 13.5”
Diameter: 4.75”
Height: 4”
- You will be cutting out rectangles of your fabric. To calculate the length of your rectangle, add together the circumference, two lots of your seam allowance and a bit extra for some ‘give’.
So my length is: 13.5” + 0.5” + 0.5” + 1” = 15.5”
To calculate the width, add together your height, two lots of your seam allowance and some extra to fold over (you can adapt this measurement to your own preference).
So my width is: 4” + 0.5” + 0.5” + 5” = 10”
Using your ruler and fabric marker, draw this size of rectangle onto two pieces of fabric (One for the outer and one for the lining). Cut these out using either a rotary cutter or scissors.
- Take one rectangle of fabric. Fold it in half lengthways, right sides together. Sew down the side and along the bottom (Be careful here if your print is directional!) Repeat for the other rectangle.

- Take one of your pieces. Flatten out the bottom so that it looks like this:

- Using a ruler, measure in from the point, half of your diameter. So I am measuring approx 2.35” . Make a little mark. Now use your ruler to draw a straight line, creating a triangle shape.

- Sew along the line you’ve just drawn. Trim away the excess, leaving a small seam allowance. Repeat steps 5 and 6 for the other side of this piece of fabric and then repeat steps 4-6 for the other piece of fabric.

- Turn one piece so it is right side out. Insert this into the other piece, so right sides are facing. Line up the side seams so they match. Pin or clip around the top raw edges, marking a gap for turning through (I like to leave a 2” gap). Sew around the top, remembering to leave your gap.

- Carefully turn your fabric through the gap so it is right sides out. Poke out the corners using your finger or something like a chopstick.

- Decide which is your lining fabric. Push this one inside your outer fabric, so they’re now wrong sides together. Finger press around the top, where the two fabrics join. If you like, pin or clip this, then top stitch, closing up the turning gap you left earlier.

- Place your plant inside, then fold over the top of your fabric pot the desired amount.

You’ve made a fabric plant pot – yay!
If your plant will need to be watered, place the pot into a plastic bag before popping it into the fabric pot. Alternatively, use a drip tray, but this will need to have been accounted for in your measurements at the start as it will probably be wider than your pot.
Now you can use this method to make pot covers of any size and of course, they don’t need to just hold plants. These fabric pots can be used to store anything you like!
I hope you enjoy following this tutorial. Share your finished makes on instagram, using the hashtag #SewHayleyJaneFQ and tag me @sewn_on_the_tyne
See you next month,
Tamlyn xx